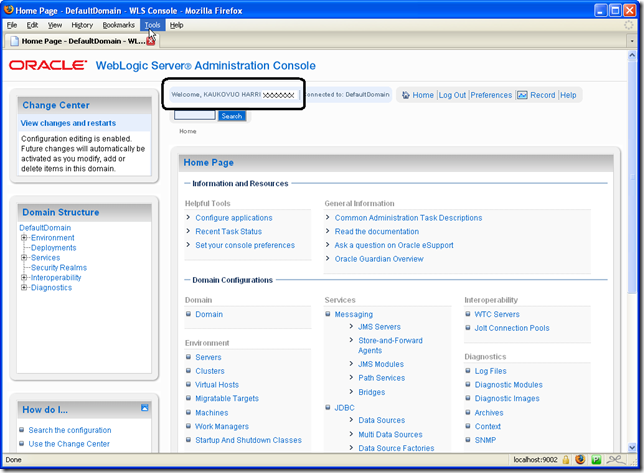
By default WebLogic admin console is deployed on the same port as other applications, non-encrypted HTTP traffic, and using username and password as authentication.
To give the highest level of security on the admin console here are some steps to take:
- Change the admin console from the standard port to SSL secured admin port
- Enable Two-Way Authentication so that only clients with valid digital certificate can access the admin console
In Finland, one of the easy ways to get official client certificate is to use your HST smart card for authentication. To use that in your workstation, you need smart card reader and software for that. Software can be downloaded free from http://www.fineid.fi/ (Follow the link "Lataa kortinlukijaohjelmisto").
In this article I've tried to summarize steps to enable WebLogic 10.3 server two-way SSL setup with HST client certificate.
To summarize the steps:
- Create self signed server certificate and store if into custom keystore file
- Extract VRK's trusted CA certificates and import them to the custom keystore file
- Setup custom keystores (for server identity and trust keystore) in WebLogic server
- Create user that corresponds the HST card username. Assign Administrative group to the user.
- Change management port
- Change admin console authentication method from FORM to CLIENT-CERT
- Test
Please note that at some point you will get a browser error stating that the server certificate is not valid. This is because of using self-signed server certificates. If you used "official" server certificates e.g. from Verisign you wouldn't get these errors. When using self signed certificates, you just need to accept the error and import the certificate on browser keystore. This error would only happen the first time(s) accessing the site protected with https (SSL).
Warning: These instructions are experimental and you should make full backup of your environment before trying anything in here. DO NOT TRY THIS IN PRODUCTION BEFORE MAKING SURE IT WORKS IN DEVELOPMENT AND TESTING FIRST.
Extracting the Trusted CA Certificates from HST Card
You will need the trusted CA (certificate authority) public certificates later in WebLogic key storage to verify the client HST card certificates. If you don't have those trusted VRK (Väestörekisterikeskus) certificates yet, here is one way to get them:
1. Open up the smart card application (here mPollux as an example):
Navigate to "Luotetut varmenteet" and first choose "VRK Gov. Root CA":

Double click on the certificate and you will get this window:

Press Details -tab.

Press "Copy to file..."

Press next.

Choose Base-64 encoded X.509 (.CER)
Press Next.

Enter the name of the certificate file and press Next.

Press Finish.

After successful export, you should have an OK window.
Repeat the same for the "VRK Gov. CA for Citizen Qualified Certificates".
After these two steps, you should have files with names e.g. vrk_root.cer and vrk_citizen.cer in your chosen folder. These are base64 encoded text files.
Creating a Self Signed Custom Keystore for Two-way SSL
Now we create a custom keystore to store the identity of the WebLogic server certificate and also to include the VRK public certificates so that WebLogic can verify the HST card client certificate against them.
Here is an example (server certificate for 10 years = 3600 days):
keytool -genkey -dname "cn=localhost, ou=Oracle Finland, o=Oracle, c=FI" -alias localhost -keypass mypassword
-keystore D:\product\JDEV11\wlserver_10.3\server\lib\harri.jks -storepass mypassword -validity 3600
Above command (by the way, keytool is found from the Java binaries) creates a keystore file named "harri.jks". You can list the contents of the file with following command:
keytool -list -storepass mypassword -keystore harri.jks
Now, import the VRK trusted certificates next:
keytool -import -file D:\temp\vrk_root.cer -trustcacerts -alias VRK_ROOT -keystore harri.jks
keytool -import -file D:\temp\vrk_citizen.cer -trustcacerts -alias VRK_CITIZEN -keystore harri.jks
Now you should have the keystore ready for two-way authentication. Next step is to configure WebLogic server to use this keystore.
Setting up the custom keystores in WebLogic
Navigate to admin console: Home >Summary of Servers >DefaultServer
Choose Configuration tab and Keystores tab.

Choose "Custom Identity and Custom Trust" from the "Keystores" popup list.
Specify the exact path to the keystore you just created above, keystore type "jks" and enter the password for the keystore.
Press Save.
Press "SSL" tab.

Choose "Private Key Alias" as the same you used in earlier chapter "Creating a Self Signed Custom Keystore for Two-way SSL".
For example if you used:
keytool -genkey -dname "cn=localhost, ou=Oracle Finland, o=Oracle, c=FI" -alias localhost -keypass mypassword -keystore D:\product\JDEV11\wlserver_10.3\server\lib\harri.jks -storepass mypassword -validity 3600'
you should enter "localhost" as the alias here to mark the unique key to the server certificate.
Press the "Advanced" link.

Change "Two Way Client Cert Behaviour" to wanted value, like "Client Certs Requested But Not Enforced" or "Client Certs Requested And Enforced".
Press Save and reboot the WebLogic server.
What Is My HST Card Username?
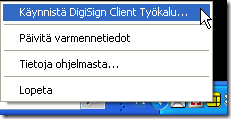
To see your username in the Finnish Government ID card, you can do it e.g. by looking at the smart card reader application. In my example I am using mPollux software and I can launch the software by choosing the context menu from mPollux tray icon (yellow icon below):

Choose the first option to start the application.
From the "Lukijat ja kortit" -tab choose the card reader -> Käyttäjän varmenteet -> todentamis- ja salausvarmenne. Double-click on that item.

You will see following window, where the "Issued to:" field will show the username you should write down for later use.

Create User and Assign Admin Privileges
Navigate to Security Realms page on admin console.

Press "myrealm" (or whatever you have in your server) link.

Press "New" to enter new user.

Enter the username that is stored in your HST card on "Name" field. You can set whatever password you like, but this is not used when enforcing client certificates. If you don't know the value to put on "Name" -field, please follow the chapter "What Is My HST Card Username?".
Assign the needed Groups to the user:

You would need at least "Administrators" group to enter the admin console application.
Change management port
To ensure security, you should change the admin console to use administration port (9002 or whichever you choose). This is done from Home -> DefaultDomain -> Configuration -> General.

After the port change, the URL is moved to this admin port right away.
Change Console Authentication Method
By default WebLogic admin console uses form based authentication (username / password). To enforce using client certification from the Finnish HST card you need to change console application slightly.
In this example I use JDeveloper 11.1 and the WebLogic that is shipped with it. On this installation, console application is found under:
D:\product\JDEV11\wlserver_10.3\server\lib\consoleapp
web.xml file is here
D:\product\JDEV11\wlserver_10.3\server\lib\consoleapp\webapp\WEB-INF\web.xml
Edit web.xml as follows. Comment out the FORM based authentication method and replace it with CLIENT-CERT method, like this:
<login-config>
<!-- Commented out
<auth-method>FORM</auth-method>
<form-login-config>
<form-login-page>/login/LoginForm.jsp</form-login-page>
<form-error-page>/login/LoginError.jsp</form-error-page>
</form-login-config>
-->
<auth-method>CLIENT-CERT</auth-method>
</login-config>
You could also change the auth-method to value “CLIENT-CERT,FORM” to fall back to username / password authentication if client certificate authentication fails.
After the changes, restart WebLogic server.
FireFox / Mozilla Setup
If you used mPollux and FireFox or Mozilla, you need to setup the security device manually (this is done only once). You do this by choosing the Tools -> Options -> Advanced and pressing "Security Devices".

Press "Load" to choose to load a new security device.
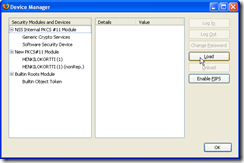
Give it a name and choose file. With mPollux it looks something like:

If you needed to do this setup, just to make sure, exit the browser and startup again.
Test Run
Close all browser windows and remove the Finnish HST card from the card reader.
Enter the HST card into the smart card reader.
Open up a browser (IE, Mozilla, FireFox ...) and enter the console URL:
https://localhost:9002/console
You should now get the smart card PIN window. An example when using Fujitsu DigiSign software, is below:
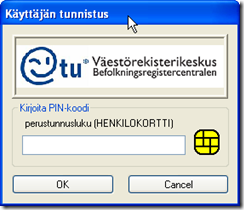
When entering the PIN code, you are allowed to enter the console, if your username is assigned to Admin group: